
Step-by-step guide to submit NPS grievance, with or without a PRAN card
The subscribers under the National Pension System (NPS) can post their queries or raise NPS grievances online from the CRA website. A unique reference number / Token ID is generated for every submitted request, and this can be used to track the status of the issue.
Not only the existing subscribers, but even an individual who is interested in the scheme can submit the grievances and questions. So, there are two stages when the NPS grievance can be raised:
- Before the NPS account is created
- After the NPS account has been activated (refer: How to open NPS account?)
On this page, we have provided the steps to submit NPS grievance online. The same process can also be used for sending enquiries regarding the pension scheme. We have also provide the steps to track the resolution of NPS grievances.
Start the NPS grievance registration
As mentioned before, individuals can raise a ticket on the NPS website even if they have not yet registered for the scheme. Simply follow the below-mentioned steps.
Step 1A: On the NPS website home page, look for the ‘Log grievance request’ option, in the footer of the page.

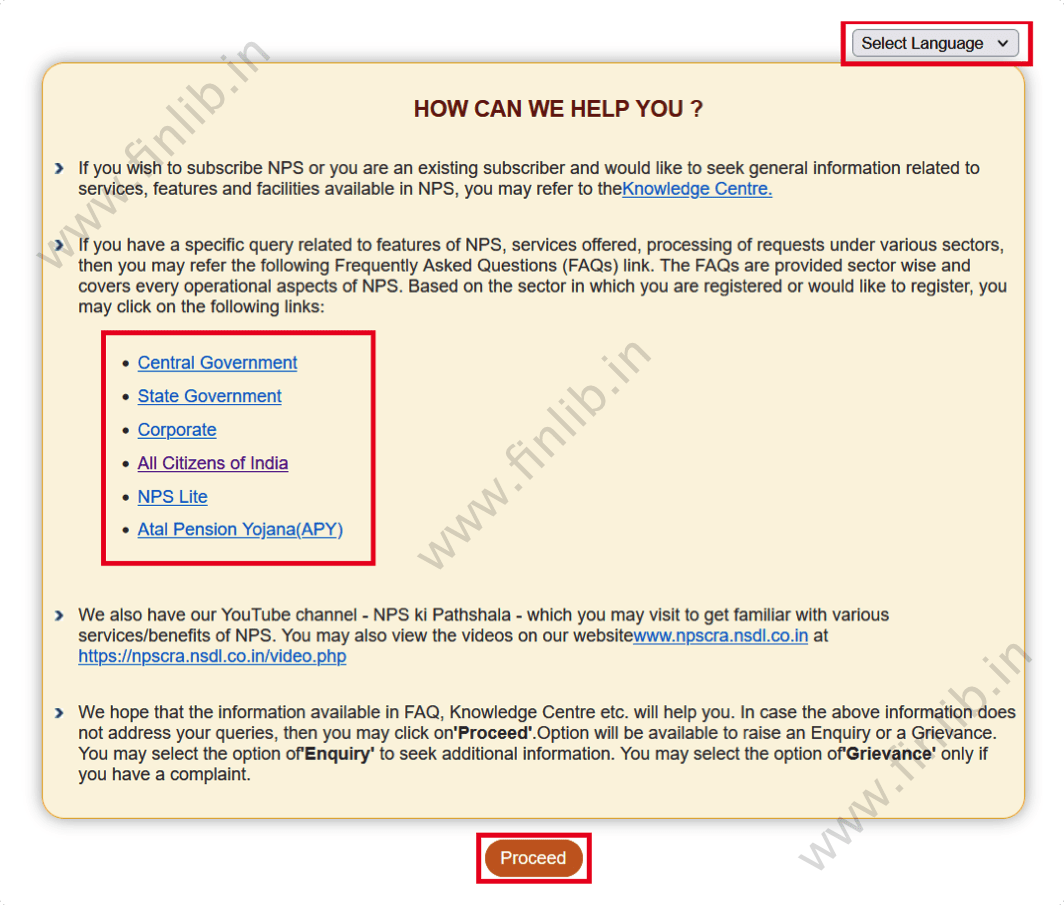
Step 2A: On the next page, the users will be recommended to first check the Frequently Asked Questions (FAQs) section on the NPS website. Most of the queries of the users are already answered there.
However, if the users still cannot find an answer to their query, then they can continue with the process to raise a ticket by clicking on the ‘Proceed’ button.
From the top-right menu on this page, the users can also change the language in which they want to raise the ticket.
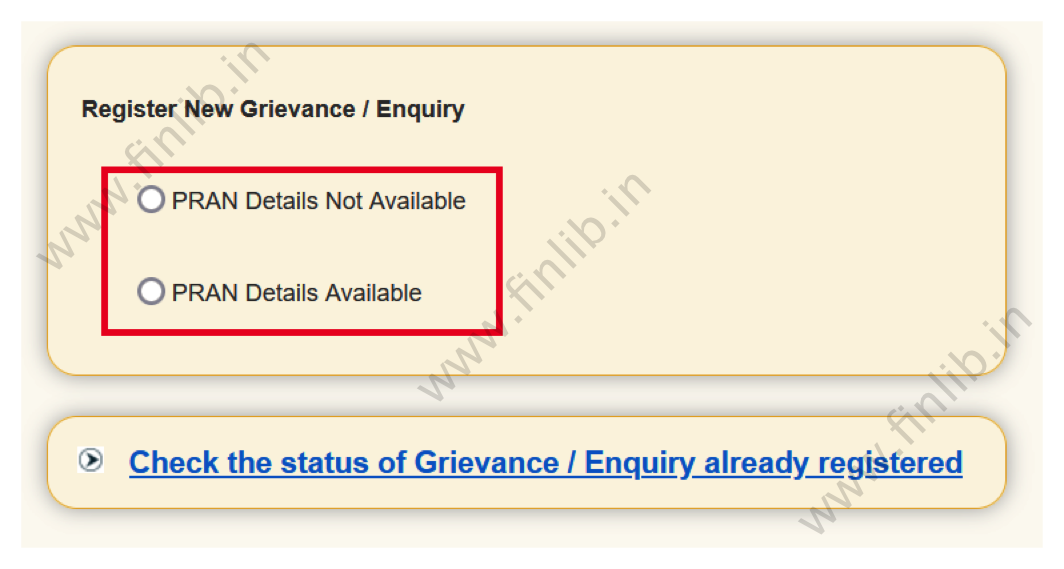
Step 3A: On the next page, the user will have to select the option if a Permanent Retirement Account Number (PRAN) is already present, or not. The PRAN is generated after the user has registered for the NPS and made the initial contribution.
Select the option: ‘PRAN Details Available’, if this data is available and the complaint is linked to the PRAN or NPS account.
If the user does not have a PRAN, then a ticket can still be opened by selecting the option: ‘PRAN Details Not Available’.
Step 4A: Depending on the option that was selected in the previous step, the user will now need to select a ‘Sub Option’ and provide additional details. Whereas if the PRAN is available, then this needs to be mentioned on this screen.
In case the PRAN is not available, then the user will have to mention their registration number or the Pay and Accounts Office (PAO) number or the ID number of their POP Service Provider (POP-SP).
Once the basic details have been mentioned, calculate and enter the Captcha and click on ‘Next’ button.

Log grievance from eNPS account
If the user already has an active eNPS account, then the grievance portal can be accessed directly from the account as well. Simply login to the eNPS account and select ‘Log Grievance Request’ in the ‘Grievance’ menu.
All the basic information will be pre-fetched from the account and the subscriber will be directly shown the NPS grievance registration page.

Details of the NPS grievance
Once the NPS log grievance screen has been displayed, the users can then enter the complete information about their problem. Just follow the below-mentioned steps.
Step 1B: On the ‘New Grievance’ page, the user will first need to enter their contact information like email ID and phone number. A notification will be sent through these contact details, when some action has been taken on the ticket.
This data will be pre-fetched from the profile if the user has raised the request after logging-in to their eNPS account. So, please make sure that the information is up to date in the profile (Refer: How to update personal details in NPS account?).
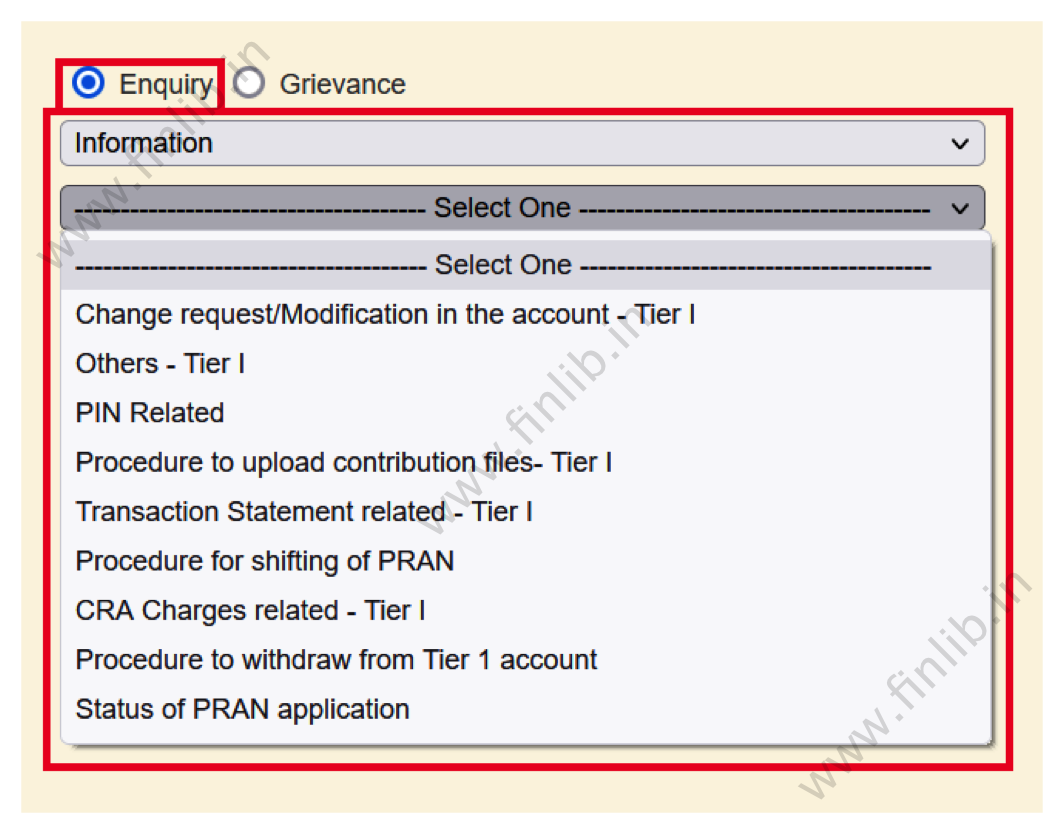
Next, the user will need to select the type of ticket that they are raising: ‘Enquiry’ or ‘Grievance’.

Step 2B: If the user selects the ‘Enquiry’ option, then they will need to select a ‘sub-option’ and a ‘Category’ for their request. In the image below, we selected the sub-option: ‘Information’ under ‘Enquiry’ and got a list of categories to choose from.
Similarly, if the user selects the ‘Grievance’ option, then they will also have to select a ‘sub-option’ and a ‘Category’.

In the image below, we selected the sub-option: ‘PRAN Related’ under ‘Grievance’ and got a list of categories to choose from.

Step 3B: Based on the chosen options and the categories, a new window will show up, which will display the most common questions and answers (FAQs) that have been asked in the past. The subscriber can go through this information and then decide if they still want to raise a ticket.
Since our NPS grievance criteria was: ‘PRAN related’ and ‘PRAN card not received’, the information that was shown to us can be seen in the image below.

After reading the displayed information, the subscriber can click on the ‘Yes’ or ‘No’ button at the bottom, to answer the question: ‘Are you satisfied with the information provided ?’.
If ‘Yes’ is selected, this means that the problem is resolved and there is no need to open a grievance anymore. But if the user still wants to open the ticket, then they can select the ‘No’ option.
Step 4B: After clicking on the ‘No’ button, the user will be brought back to their NPS grievance form and they can provide additional details. The ‘Grievance Description’ text box can be used to type the problem and some files can be attached for reference as well.
The user will also need to select an ‘Entity’ against whom the grievance is being raised in the ‘Grievance Raised Against Entity Id’ option.
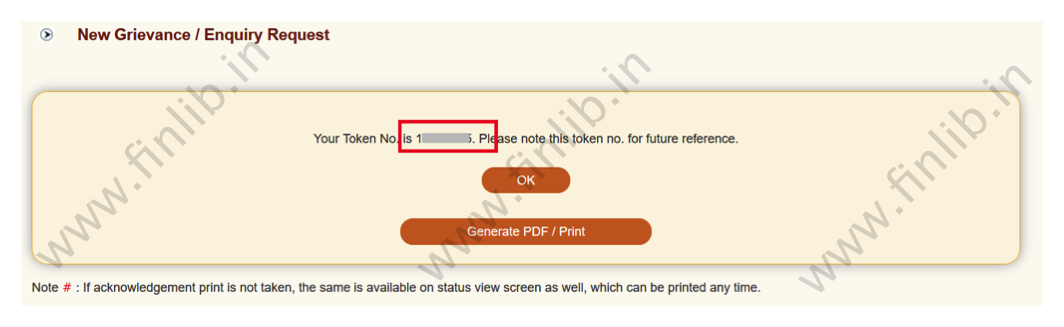
Once all the details have been entered, click on the ‘Submit’ button.

Step 5B: If the information has been provided in the correct format, then a Token number will be generated and displayed to the user. This will be helpful to track the status of the request in the future.
NPS grievance status
To view the progress on the raised ticket, the token number that was generated in the previous step can be used. Just follow the below-mentioned steps to check the status.
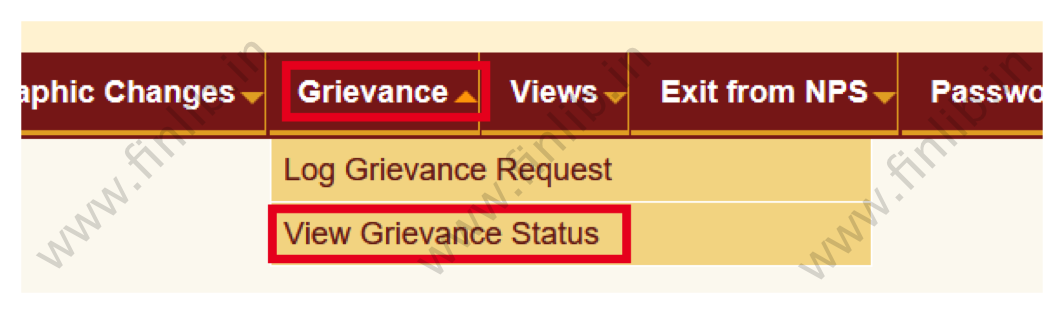
Step 1C: If the user is logged into their eNPS account, then they can go to the ‘View Grievance Status’ option, under the ‘Grievance’ menu.
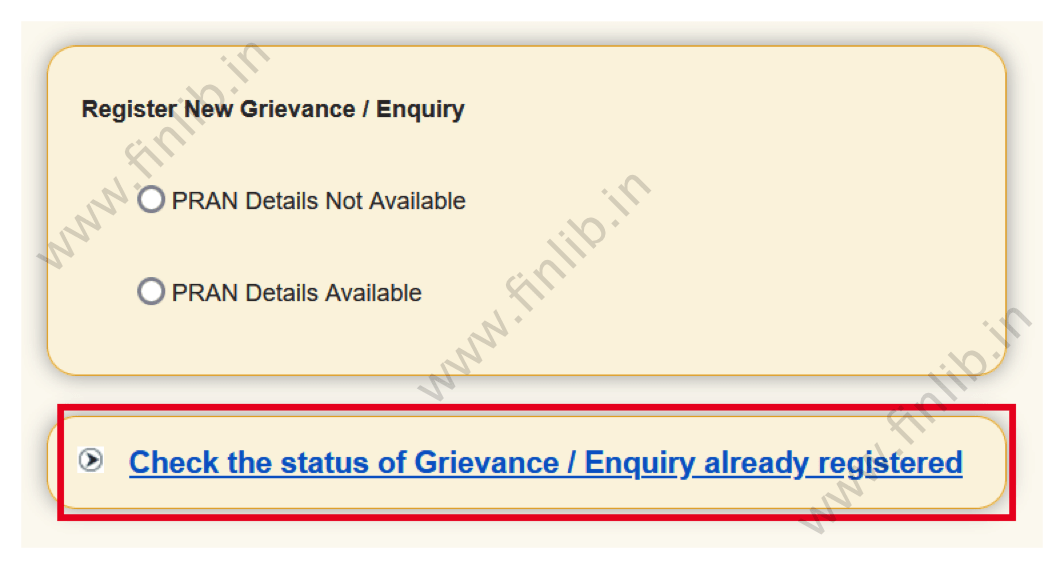
Alternately, if the user is not currently registered, then they can access the NPS grievance portal from the home page, without logging in. (follow Step 1A to Step 3A, from above)
Click on ‘Check the status of Grievance / Enquiry already registered’ button.
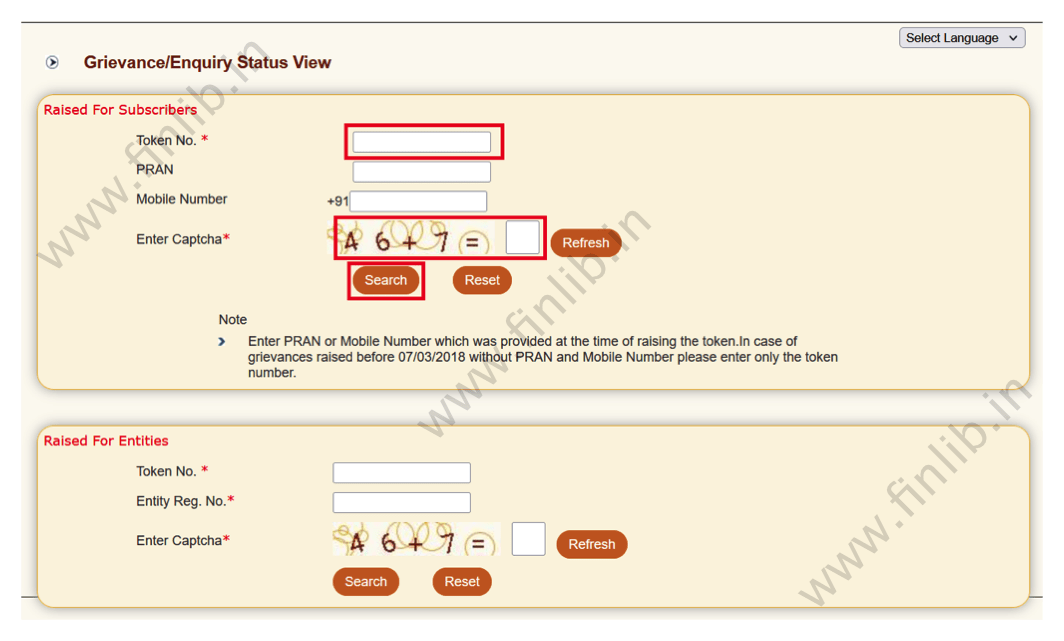
Step 2C: If the user is logged in to their eNPS account, a search form will be shown. On this page, the user can search for the tickets using either one of these combinations:
‘Token No.’ and ‘PRAN’
or
‘From Date’ and ‘To Date’
If the Dates option is used, then all the tickets that were opened between the selected dates (both days inclusive) will be displayed.

If the subscriber is not logged into their eNPS account, then they can only search using their ‘Token No.’ and ‘PRAN’.
Calculate and enter the captcha (’53’ in the image below) and click on the ‘Search’ button.
Step 3C: Based on the search criteria, a list of tickets will be displayed to the user. It is then possible to view the current status of each ticket in the ‘Status’ column.
Also, the user can click on the ‘Token No.’ to view the initial ticket that was raised.

Step 4C: When the ‘Ticket No.’ is clicked, the full ticket will be displayed, which will show the request that was submitted. The user can also select the ‘View History’ button, to check the progress and actions that have been taken on the ticket.

Step 5C: In the ‘Grievance History’ section, a timeline of the actions will be displayed to the user. As it can be seen, our ticket is currently in progress and no action has been taken yet.

Step 6C: After the problem has been solved, the ‘Status’ of the ticket will change to ‘Resolved’ and ‘Resolution Remarks’ will be displayed to the user.

Similarly, the ‘Grievance History’ page will get updated as well. The user can then refer to the resolution that has been given by the NPS support team.

Notification to the user
When a ticket is created on the NPS website, the token number and other details will be sent to the subscriber through the contact information that was entered in the grievance form. Similarly, another notification will be sent when the ticket is resolved, or when any action has been taken on the ticket.
Disclaimer
- This page is for education purpose only
- Some information could be outdated / inaccurate
- Investors should always consult with certified advisors and experts before taking final decision
- Some images and screenshots on this page might not be owned by FinLib